Improved Self-Hosted WordPress Performance
My self-hosted WordPress website was slow. Google Analytics Site Speed showed page load times fluctuating from 8 to over 15 seconds. I know that anything over 2 seconds is bad and results in lower traffic and search engine referrals. I have put up with this slowness for years, but now I need to address this problem. I spent time with Google searching and reading about WordPress settings, plugins, content delivery networks (CDNs), and web host configurations that are designed to improve site performance. There are links to many of the resources I used throughout this post. Furthermore, if you are hosted with an optimized WordPress hosting service, then these steps may not be necessary because of the hosting provider’s optimization. Please check with your hosting company.
I am not an expert, and I addressed my website’s performance problem through trial and error. I tried many combinations of plugins and setting before locking in on the below mix. I am NOT being compensated for this post in any way. It is my experience, and some of this information may very well be wrong. If anyone has suggestions or recommendations to improve the performance of a self-hosted WordPress site, please post a comment. Thank you for the help! –Mike
Initial Page Speed Assessment for www.cruseit.com
- Google PageSpeed Insights Score: 64/100 (D)
- Google Analytics Site Speed: 8-15 Seconds
- Pingdom results using the New York Test Server
- Grade: 65/100 (D)
- Requests: 49
- Load time: 13.6 seconds
- Size: 1.6Mb
- Slower than 88% of websites
- These are very dismal results, and it is no wonder why my site traffic has fallen badly over the last couple of years.
Final Optimization Results as of 03/23/2016 – a significant improvement in the site performance!
- Grade: 83/100 (B)
- Requests: 19
- Load time: 0.914 seconds
- Size: 460.6 kB
- Slower than 9% of websites
What I Used
Note: the free plugin versions were used, but I believe in supporting the developers. Thanks and free press for the developers are nice gestures, but it does not pay their bills. All software takes time and serious skill to develop so buy their services & software if it is valuable to you.
- Plugin: W3 Total Cache
- Plugin: WP Smush
- Plugin: An SEO Plugin (I used All In One SEO Pack)
- Plugin: Jetpack by Automattic
- CDN: CloudFlare (setup instructions – I use the W3 Total Cache minify settings over CloudFlare’s for the time being)
- A self-hosted WordPress version 4.4.2
- Web Host: Media Temple’s Grid Shared Hosting
Before We Begin, Backup…Backup…Backup
Anytime major changes are made to your blog, it is important to back up the site before starting. If things go wrong, you can always restore the site. If you do not have a backup process already in place, it is simple to add. Login into your site admin page, go to plugins, select “Add New” and search “Backup.” Many of these backup plugins support multiple storage options, including writing the data to Google Drive, an FTP account, Amazon S3, and Azure. Please take to look them over a few seem to be shady, so taking some time with Google is in order. I have purchased backup service through Automattic’s VaultPress, and it is working well. Please, Please, and Please, take the time to back up your site—including the database—before continuing on with this post.
Creating a Blog’s Baseline Scores
Go to Pingdom and test your website as a baseline. Click on “Settings” and pick a server in the “Test from” section. Keep using the “Test from” server throughout the process. If you are doing this over multiple days, you will want to test at roughly the same time to make sure you are comparing apples-to-apples. Once complete, visit Google’s PageSpeed Insights and complete a test. Be sure to document your results to see what changes are improving your scores. My initial scores are listed below.
- PageSpeed Desktop Score: 64/100 (D)
- Pingdom Grade: 65/100 (D)
- Requests: 49
- Load time: 13.6 seconds
- Size: 1.6Mb
- Slower than 88% of websites
Time for a clean-up
Review your installed plugins and deactivate and remove any plugins that you do not need or want. Look at each plugin and think about what it will do for the performance of the site and does it help deliver your content.
Example: Page View Plugins to show most popular posts.
These write an entry to your database each time a page is loaded. This will slow your website down, and what value does it bring to your readers?
Alternative: Use Google Analytics or the Site Stats component of Jetpack to understand your best posts.Example: Related Posts Plugins
These are great and may help retain visitors longer. However, many will process the data on your webserver and hit your database hard. This slows down your website.
Alternative: Use a plugin that shifts the burden off of your site. The Related Posts feature in Jetpack is one such plugin.
Do not have another cache or optimization plugin installed as it could conflict with the plugins that I listed in the What I Used section. Review the features included with Jetpack and disable anything you are not using. If possible, see if you can disable any feature or option of the other plugins that are not being used. Basically, if you are not using it, don’t enable it. Since we are in clean-up mode, take a critical look at the widgets that are being used. Do they serve the purpose in helping your visitors consume or find additional content? Do they add value to the visitor’s experience or aid in establishing the blog’s authenticity?
Once complete, clear the cache from your web browser and visit your site. Does it look right? If so, complete another set of tests and see how your results compare. If the site looks off, go back and enable one thing at a time until you find the feature you were looking to restore.
Are you considering changing your theme? Now would be a great time to do it. Once your new theme is active and the widgets set, run the tests once again. The site is clean, and you have a solid performance baseline metrics for your WordPress site.
House Keeping (not speed related…but many people forget to do it)
Update WordPress, themes, and plugins to their latest versions. Please do this frequently for improved security, stability, and performance. Next, we want to make sure that you have an updated SEO plugin. The website title, description, keywords, Google Analytics tracking code, webmaster verification code, and any other headers that need to be added. A good plugin should allow you to set your robots.txt file. Jetpack will take care of creating a sitemap that should be submitted to Google and other search engines through their respective webmaster tools.
Plugin Overview
- Jetpack by Automattic
This is a powerhouse plugin and has a ton of features to offer including an image CDN. Use Photon if your web hosting provider does not have a relationship with a CDN that comes with your service. Media Temple uses CloudFlare as their CDN partner and a basic subscription is included with my hosting service. This is becoming more popular, and you should check your host’s control panel. - WP Smush
Images can represent a huge slowdown for websites. WP Smush optimizes your images as you add them to your media center in WordPress. Additionally, it can optimize your images already in your blog in batches. This can take time, and you must stay on the page to do it. Do not skip this step! - W3 Total Cache
This is a great caching plugin. It will create static HTML files for your website. These files are much faster to deliver than the PHP files that WordPress uses. Additionally, this plugin will update these static files as you make new posts or when they need to be refreshed because of age. The plugin will require some configuration, but it is well worth it. There was some concern regarding the continued active development of this plugin. WordPress Tavern did a nice write-up on its status.
Setup Details
Jetpack by Automattic
Install and activate the plugin. This is straight forward. I disabled the following features: beautiful math, carousel, comments, Gravatar, JSON, Likes, Markdown, Monitor, Photon, Post by Email, Single Sign On, Site Verification, Galleries, VideoPress, and Data backup. I use Disqus as my comment system, so I use the Disqus Conditional Load plugin. If you do not have a CDN that comes with your web hosting services, then you should enable Photon.
WP Smush by WPMU Dev
Install and activate the plugin. From the plugin page under WP Smush, click on “Settings.” Place a check mark in “Smush images on upload” and then “Save Changes.” Next, under “Smush in Bulk,” press “Bulk Smush Now” until all of your prior images have been optimized. This will take a while based on how many images are in the media library. The free version limits it to 50 images per press. I pressed “Bulk Smush Now” a lot… Once complete, I averaged a 20% reduction across my entire media library.
W3 Total Cache by Frederick Townes
Before installing this plugin, open another browser window in Incognito or InPrivate mode. Then go to your blog’s home page in that private window. Once you are at your home page in the private browsing window, Right Click on the page and view the page source code. In Google Chrome, the option is “View page source.” In Microsoft Edge, this option is “View Source.” You will need this code window later so do not close it.
NOTE: If you use the mobile theme that is part of Jetpack or WP Touch, then your desktop users may see mobile versions of pages. Some additional steps are required to address this issue. I am working on these steps and will do a separate post once it is complete. One quick option is to disable the Jetpack mobile theme support and see how your theme looks on your mobile phone. Many newer themes work great. Another workaround is to make a few changes. These are temporary workarounds, and I know it.
Now, move back to your main browser window that is logged into the WordPress admin page. Go to plugins and install/activate W3 Total Cache. I did not have to reset any security permissions as they were all set correctly way by default. There is an excellent setup guide completed by Ahmad Awais, and I do not believe in reinventing the wheel. The Guide is broken into a few parts and takes you through all the key configuration steps.
Our option configurations were very close. We diverged in the advanced minify area. The options I used are listed below. You should test both methods (Ahmad Awais first) to see what works best for your site. This includes speed and functionality.
Minify Details Page (Performance | Minify)
HTML & XML
- Line break removal: Enable
JS
- Minify for all three options and select Embed type: “Non-blocking using async”
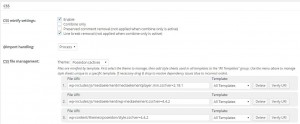
This is where it starts getting more complex. I went back to the other browser window where I have the code for the web page displayed. I then searched through that code to find all the Java files. There are three sections where these files will typically live. You will need to look closely, but find file names ending in “.js” after the <head> and before </head>, after the <body> tag but close to it, and before the closing </body> tag. In looking through the View Source and using the search function, it is pretty easy to find all the files that end with “.js”. Please be aware that some of these files will have parameters after the .js that begin with a “?”. Please see the below screenshot for what some of my entries look like. You need to be sure to group the Java files in the correct section and in the same order as what was listed in the View Source. It is not hard to look through the page source and find these files. You may want to view the source on some of the other pages and posts to see if the Java files are used consistently throughout the site. If not, you can specify the Java files by template page type. In my particular case, all “.JS” files were consistent across the different page and post types, so I was able to apply them to “All Templates”.
 Click image for a larger view

CSS
I specified the .css files in the same way as I did for the Java files above.
 Click image for a larger view
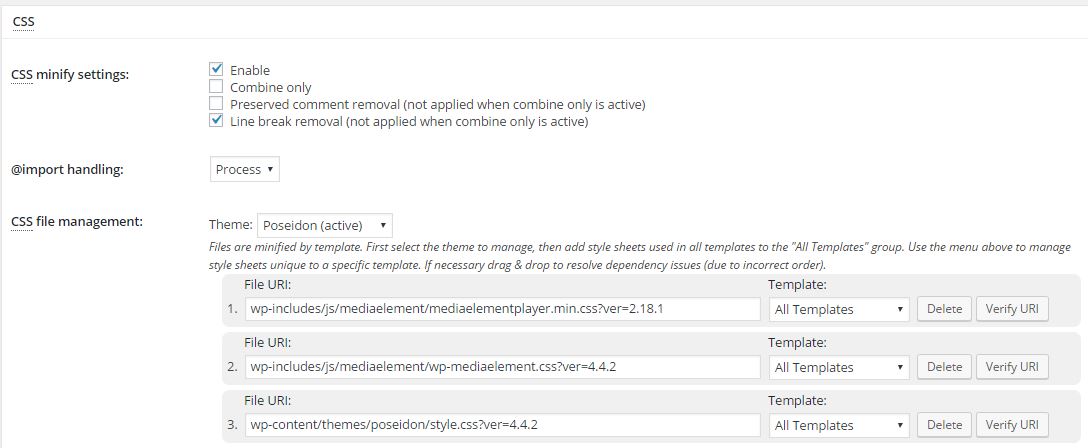
Even though my screenshots only include a few files listed, I had 16 Java files and 8 CSS files.
Wrapping It All up and Publishing
I then “Saved all settings” and went to the Dashboard underneath Performance. If you have not done so already, deploy your configuration. If you have already saved this configuration, you will simply need to empty all caches. At this point, I opened up another browser in incognito mode, emptied its temporary files, and thoroughly tested the site. I was not able to detect any visual or functional anomalies for my site. I tested search, navigation, links, comment forms, and the feedback form. I logged in and out of the admin portal several times, and everything worked as it should.
Retesting to Assess the Results
I performed new PageSpeed Insights and Pingdom test. The results were phenomenal. The improvement was dramatic, and I was shocked at how fast I could navigate the site after the cache was seeded.
- Grade: 83/100 (B)
- Requests: 19
- Load time: 0.914 seconds
- Size: 460.6 kB
- Slower than 9% of websites
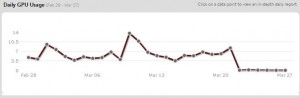
Furthermore, take a look at my server load below. I use a shared hosting platform so GPUs represent an allocation of CPU resources. Can you tell when I deployed the cache?
After this was completed, I enabled the content delivery network, CloudFlare, that comes with my hosting provider. My performance decreased slightly but that CDN offers several advantages, including greater website security. For now, I am leaving the CDN enabled and seeing how it performs over time. Currently, it is reducing server bandwidth by 20%. I will spend some time tweaking its configuration to figure out how to get the best performance out of it.
I hope this information helps, and please let me know if you have other tips or alternative configuration settings that produce better results.